Creating Your First Campaign
This guide walks through creating a notification bar campaign in ConvertForce from start to publish. The same steps apply to popups and slide-ins — only the campaign type differs.
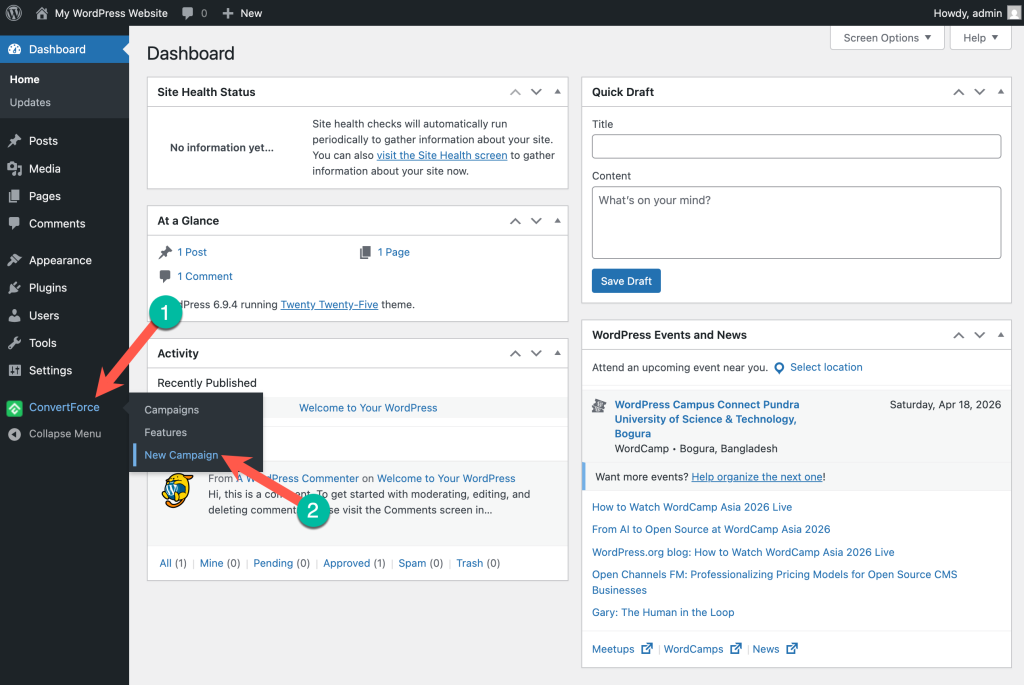
Step 1: Open the Campaign Builder
From the WordPress admin sidebar, navigate to ConvertForce → New Campaign. This opens the campaign builder, which is powered by the WordPress block editor.
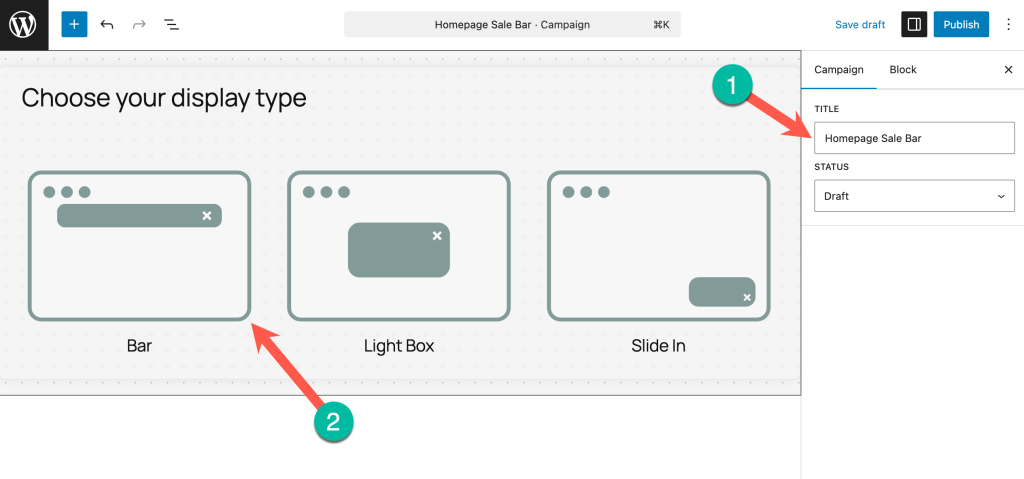
Step 2: Name the Campaign and Choose a Display Type
Enter a name for the campaign at the top of the editor. A descriptive name like “Homepage Sale Bar” or “Newsletter Signup Popup” makes campaigns easier to identify later from the All Campaigns screen. The name can also be changed later, but entering it upfront is recommended.
Next, choose a display type for the campaign:
- Notification Bar — A slim bar that appears at the top or bottom of the page.
- Lightbox Popup — A centered popup that overlays the page content.
- Slide-In — A compact panel that slides in from the corner of the screen.
The display type determines how the campaign appears to visitors. Each type is designed for different use cases — notification bars for site-wide announcements, lightbox popups for high-attention offers, and slide-ins for subtle, non-intrusive prompts.
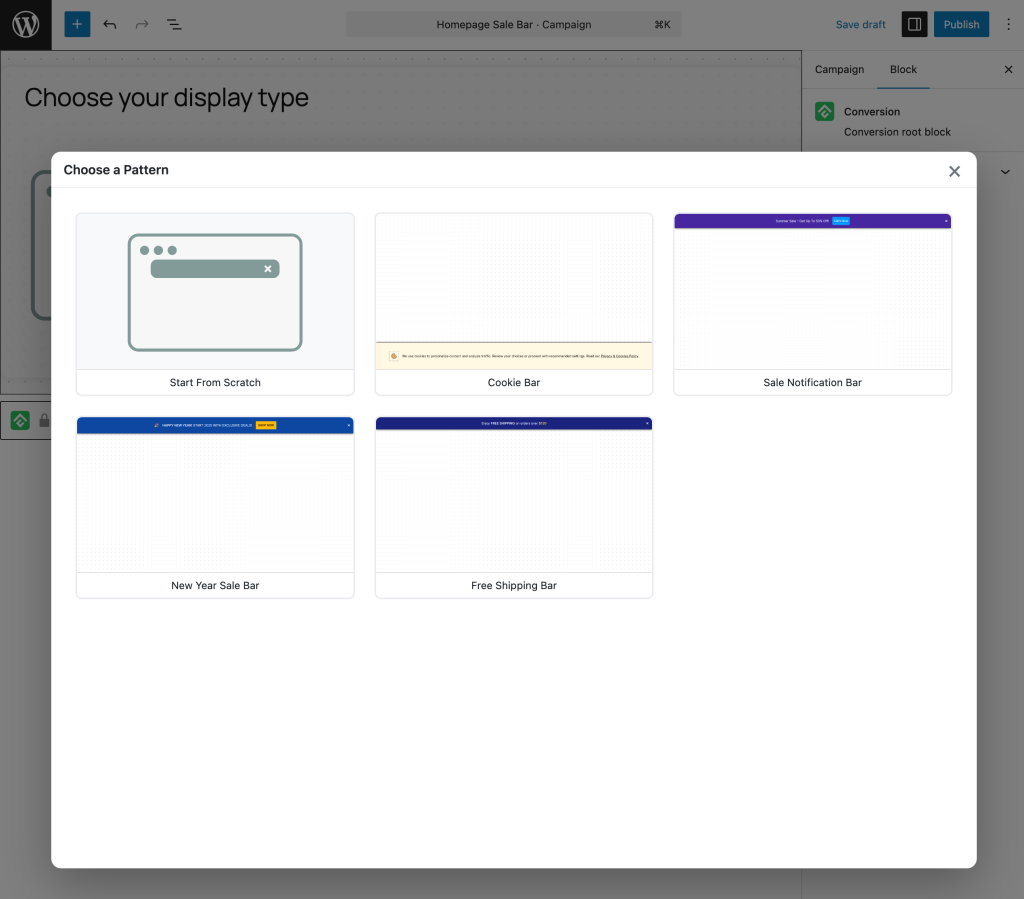
Step 3: Choose a Template or Start from Scratch
Notification bar campaigns offer a template library with pre-designed layouts. Select a template that matches the campaign’s goal — promotional announcement, newsletter signup, holiday sale, and more — to start with a ready-made design that can be customized.
To start from a blank canvas instead, skip the template selection. The editor will open with an empty canvas ready to be built from the ground up.
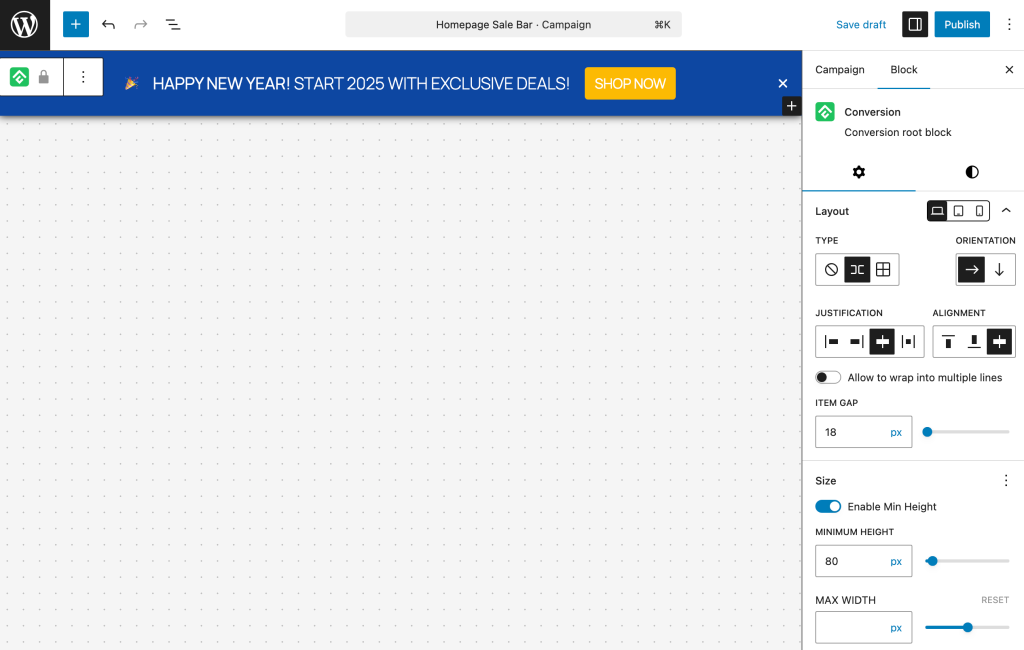
Step 4: Design the Campaign
The campaign is built using the WordPress block editor. Standard Gutenberg blocks — paragraph, button, heading, image, and more — can be added, rearranged, and styled just like editing a regular WordPress post or page.
Because the editor is native Gutenberg, any customization that works in the block editor works here: colors, typography, spacing, alignment, and block settings are all available through the standard block editor controls.
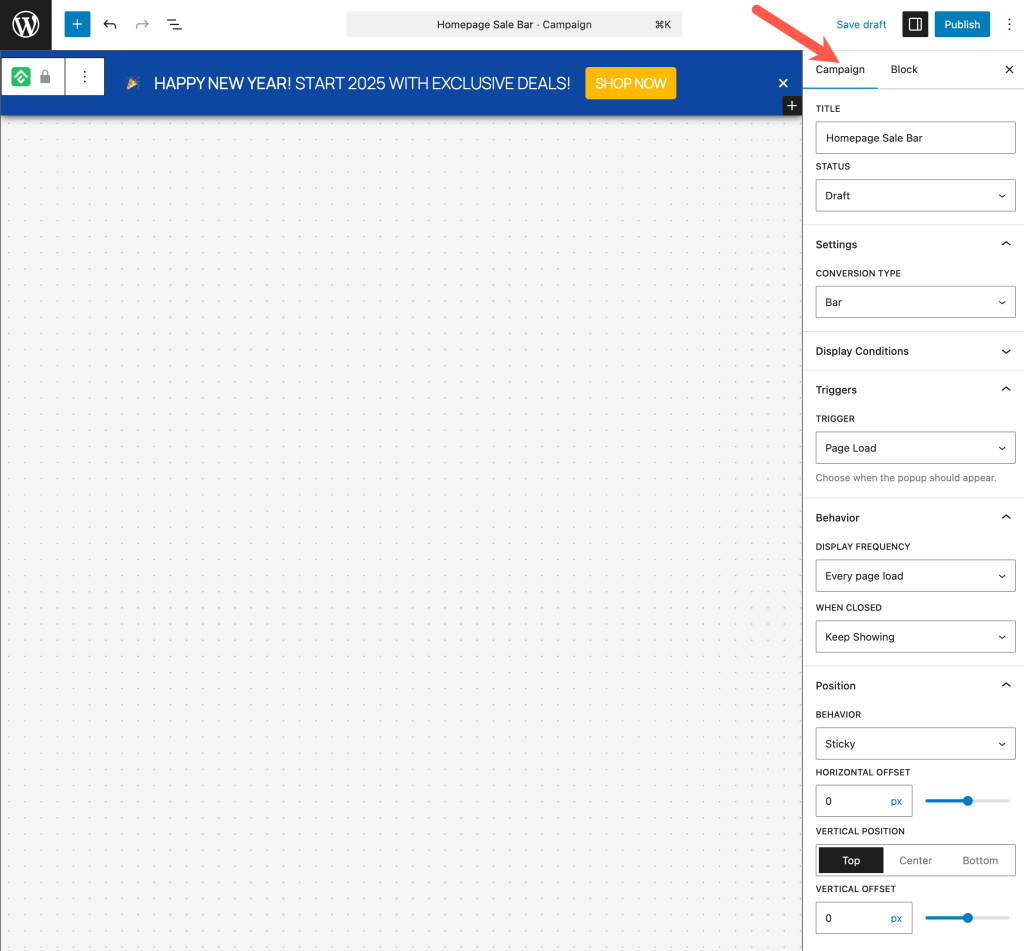
Step 5: Configure Campaign Settings
Campaign-specific settings — such as where the campaign appears, when it triggers, and display behavior — are configured from the Campaign tab in the right-hand sidebar.
Open the Campaign tab to access settings like display rules, trigger options, and behavior controls. These settings determine how and where the campaign is shown to visitors.
Step 6: Publish the Campaign
Once the design and settings are ready, click the standard WordPress Publish button in the top-right corner of the editor. The campaign goes live immediately and starts displaying on the site based on the configured display rules.
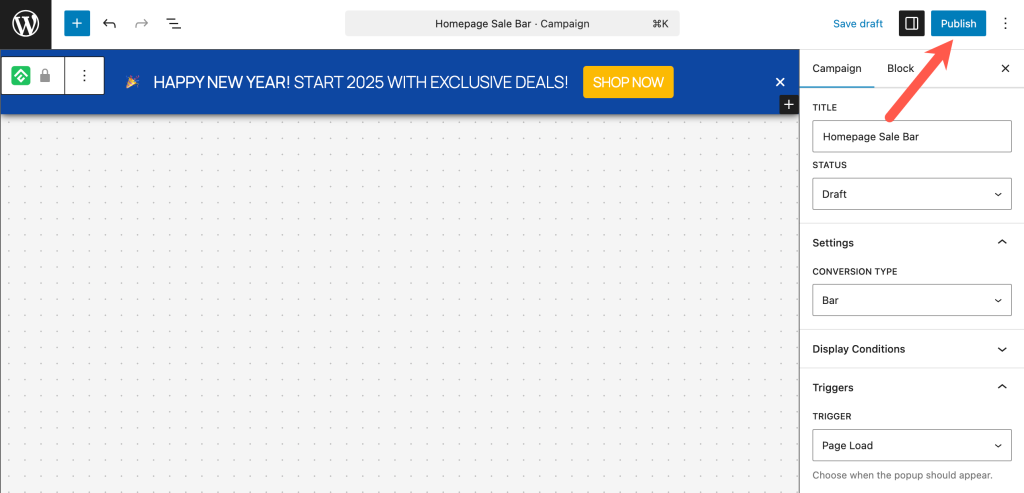
After publishing, the campaign appears in ConvertForce → All Campaigns, where it can be edited, paused, duplicated, or deleted at any time.
Next Steps
With the first campaign live, explore other campaign types and advanced configuration:
- Learn about the three campaign types — notification bar, popup, and slide-in.
- Configure display rules to show campaigns on specific pages.
- Manage and organize campaigns from the All Campaigns screen.
Frequently Asked Questions
Do I need to select a template to create a campaign?
No. Templates are optional. Campaigns can be built from a blank canvas using the WordPress block editor.
Can I change the campaign name after publishing?
Yes. The campaign name can be edited at any time from the campaign editor.
Where do I configure where and when a campaign appears?
Campaign settings — including display rules and triggers — are configured from the Campaign tab in the right-hand sidebar of the editor.
How do I edit a campaign after publishing?
Navigate to ConvertForce → All Campaigns, locate the campaign, and click to open it in the editor. Changes are saved and applied using the standard WordPress Update button.