
Learn how to create an exit intent popup in WordPress using ConvertForce Pro. Build your popup with any core WordPress block and trigger it on exit intent in minutes.
In this competitive online space, it’s challenging to grow a business unless you can capture visitors before they leave. Research consistently shows that well-timed popups can convert 3.5% to 4% of web visitors into customers or subscribers.
Exit intent popups are one of the most effective tools for this. Instead of interrupting visitors mid-read, an exit intent popup appears only when someone is about to leave your page, right as they move their cursor toward the browser’s close button. The timing is intentional: visitors have already seen your content, so they’re better qualified, and the popup doesn’t disrupt their reading experience.
In this tutorial, we’ll walk through how to create an exit intent popup in WordPress using ConvertForce. Exit intent is a Pro feature, so you’ll need ConvertForce Pro to follow along.
Step 1: Install and Activate ConvertForce
From your WordPress dashboard, go to Plugins → Add New and search for “ConvertForce.” Click Install Now, then click Activate.
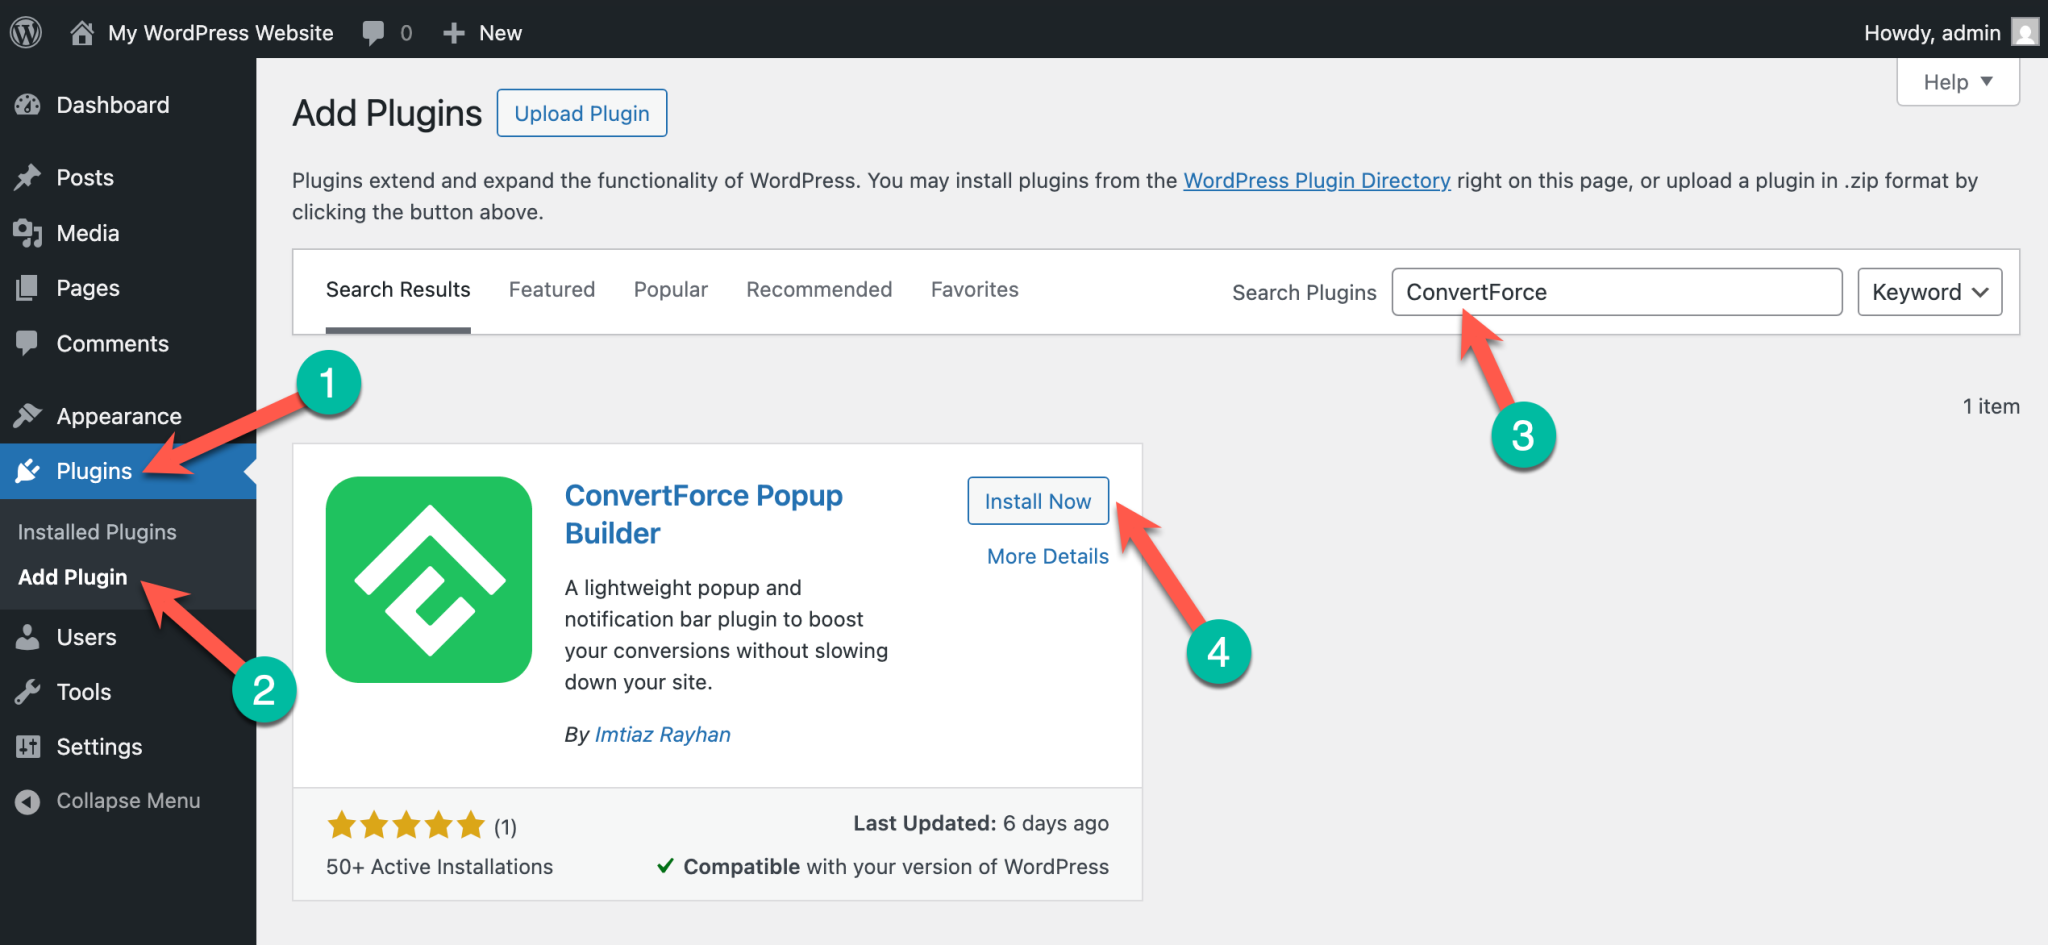
You can also download the plugin directly from the WordPress.org plugin repository and upload the zip file manually if you prefer.
Once activated, a new ConvertForce menu item appears in your WordPress admin sidebar.
Note: Exit intent is a Pro feature. If you’re on the free version, upgrade to ConvertForce Pro to unlock it along with scroll depth and user inactivity triggers.
Step 2: Create a New Lightbox Campaign
Go to ConvertForce → New Campaign in the admin sidebar.

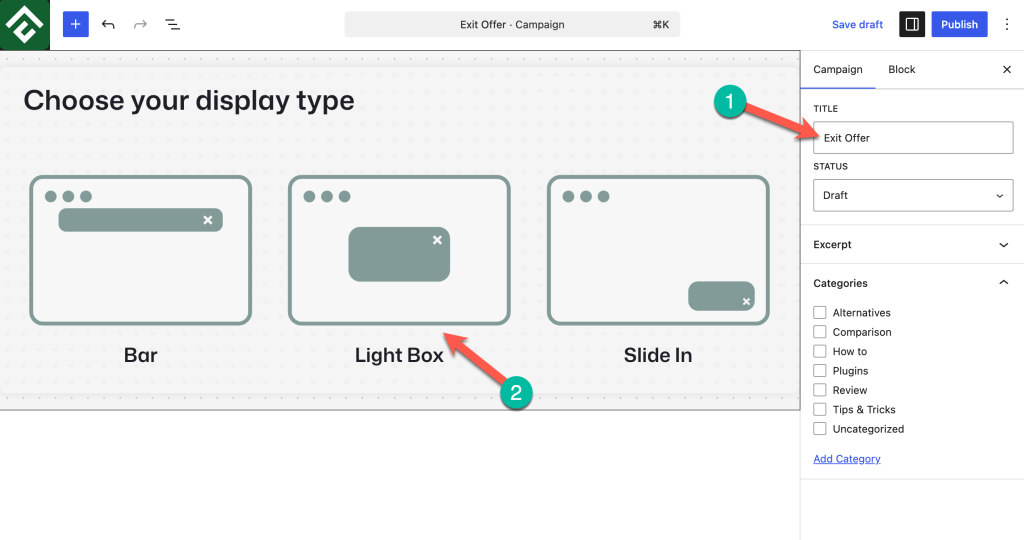
Give your campaign a name you’ll recognize later, like “Exit Offer” or “Last Chance Discount.”
ConvertForce supports three campaign types: lightbox popups, notification bars, and slide-ins. Select the Lightbox campaign type, then click through to the editor.
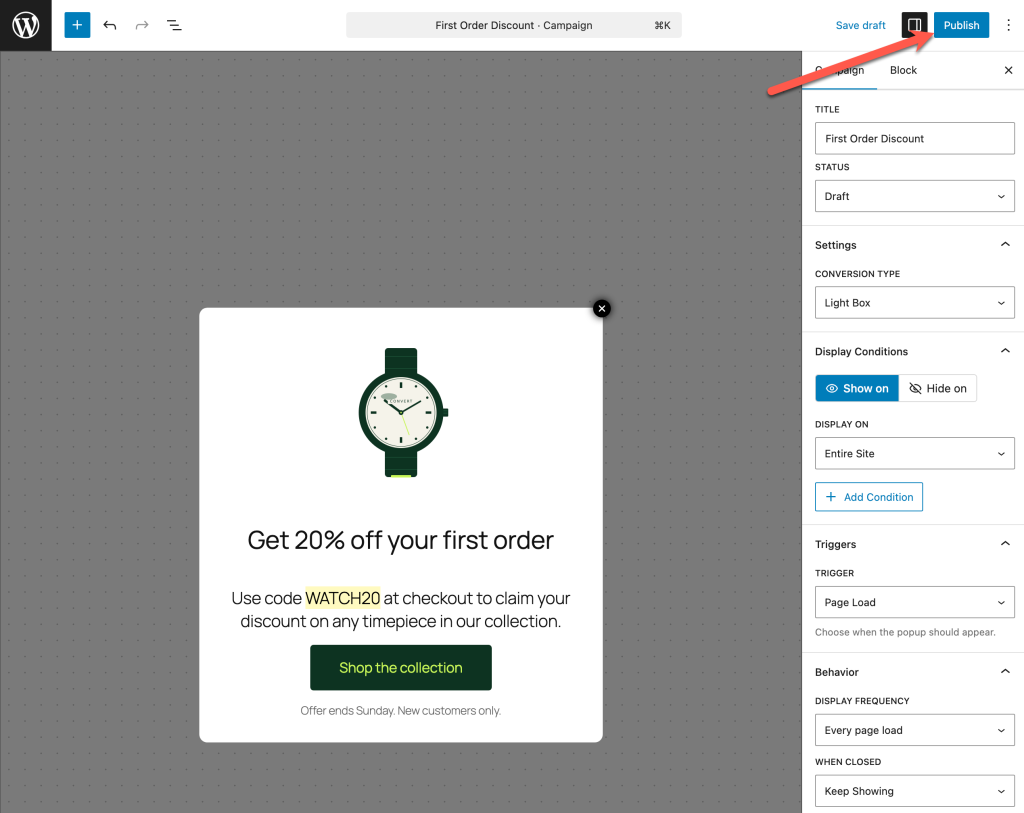
Step 3: Build Your Popup Content
This is where ConvertForce works differently from most popup plugins. Adding content to your lightbox works exactly like adding content to a regular WordPress post. Click the plus icon, search for the block you want, and drop it in.
For a typical exit intent popup, a heading block, a paragraph block, and a button block is all you need. The heading carries your offer, the paragraph adds supporting detail, and the button sends visitors wherever you want them to go next.
If you need something more involved, you can add an image, a video, a multi-column layout, or any other core WordPress block. ConvertForce supports every native WordPress block inside the popup, so the structure is entirely up to you.
Step 4: Set the Display Conditions
Once your popup content is ready, choose where it should appear on your site. By default, a new campaign will show across your entire site. ConvertForce lets you narrow this down to specific pages, posts, or post types.
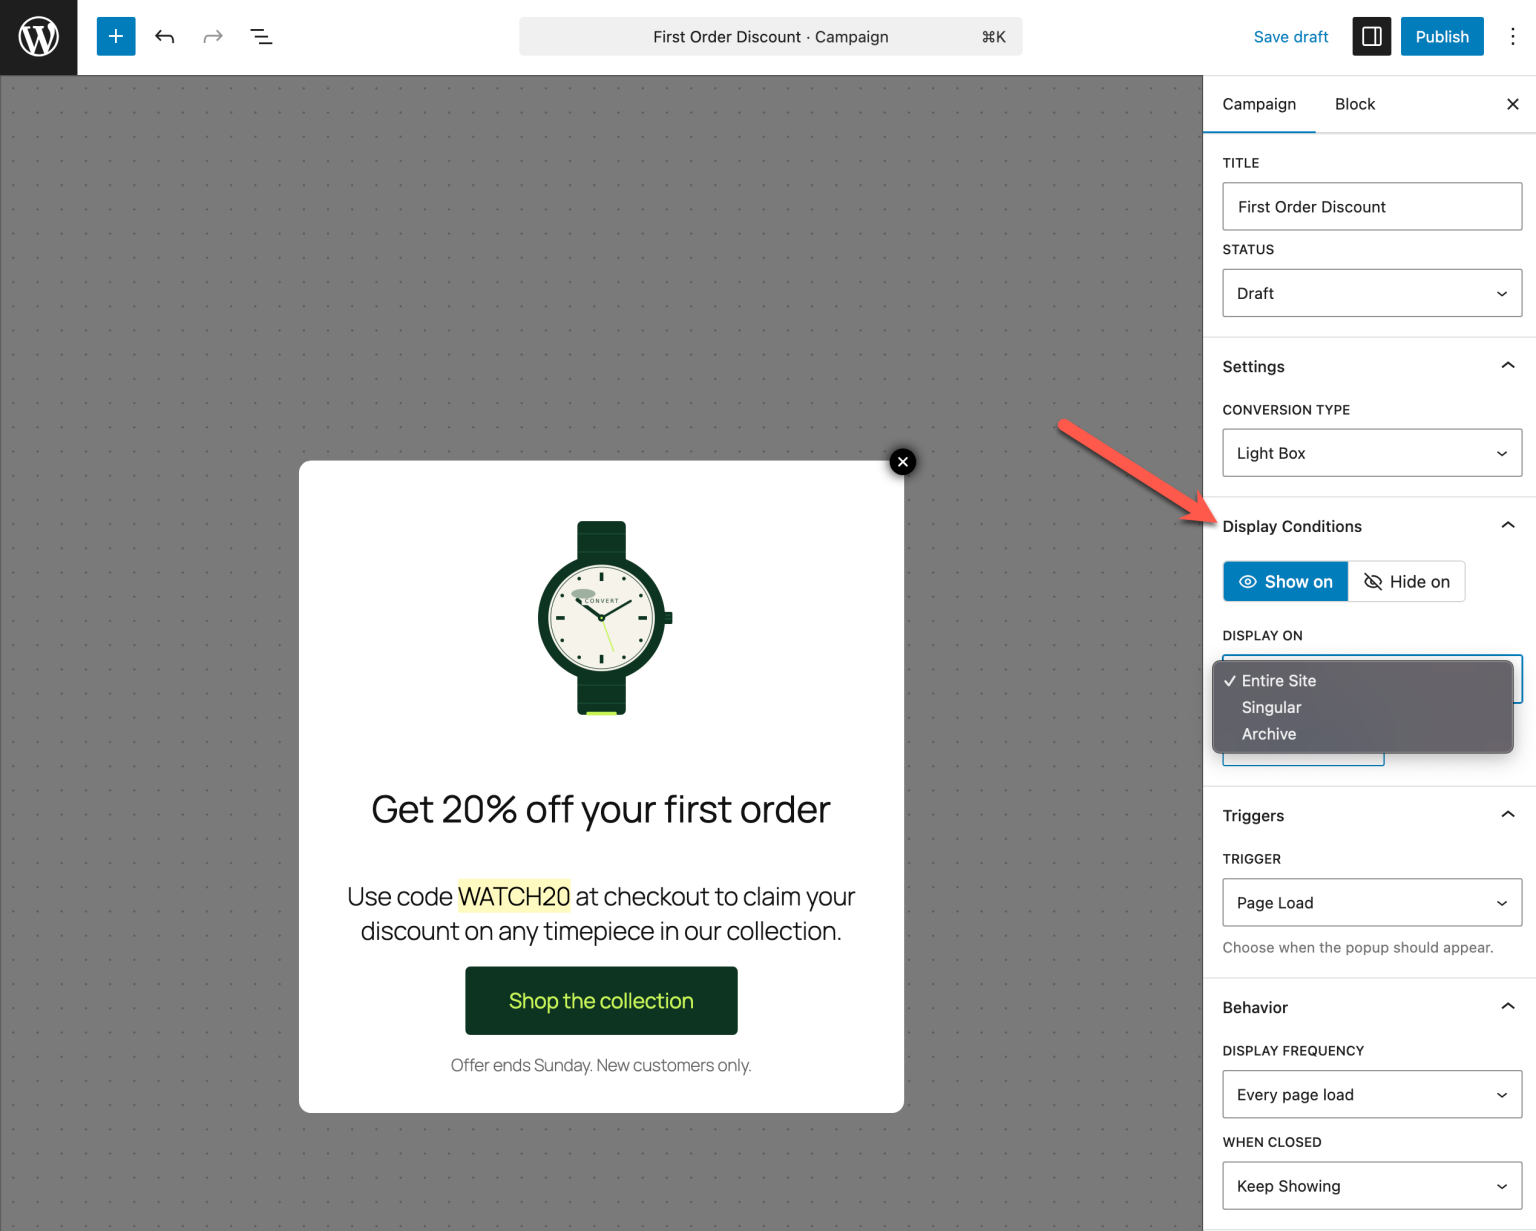
A popup offering a discount on a specific product will convert far better on that product page than site-wide. Take a moment to think about where this particular popup actually makes sense.
Step 5: Set the Trigger to Exit Intent
This is the key step. In the campaign settings, navigate to the Triggers section and select Exit Intent.
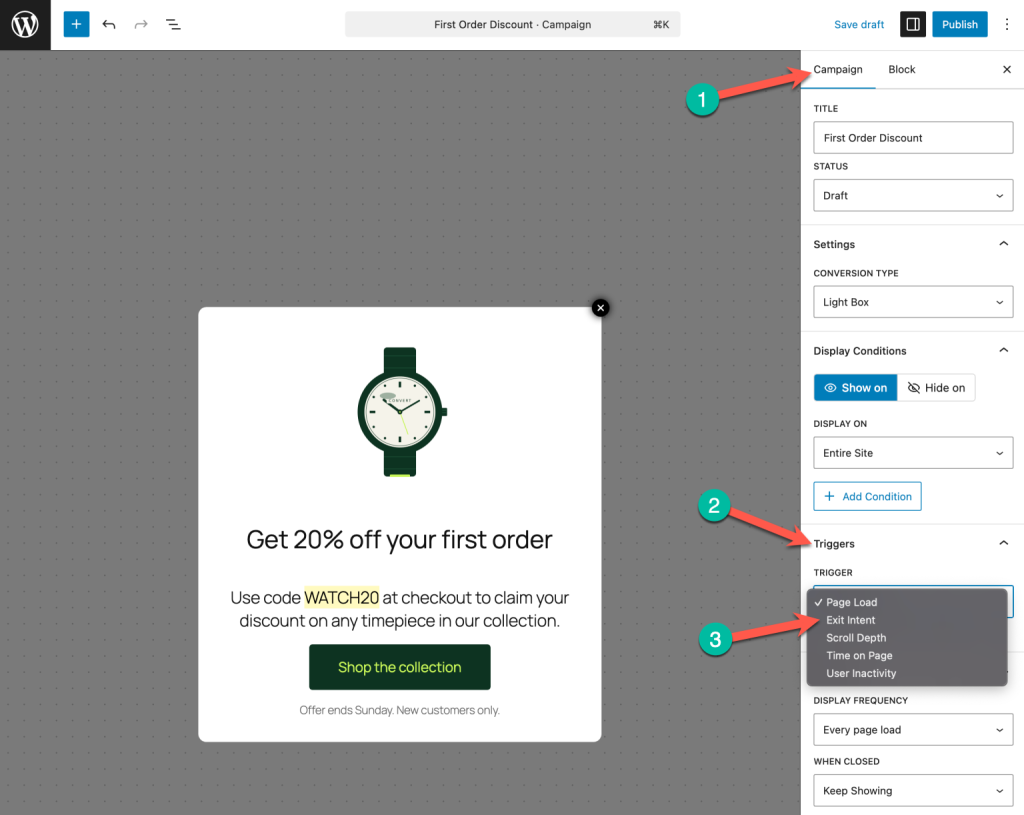
On desktop, exit intent fires when the visitor’s cursor moves toward the top of the browser window, toward the close button or address bar. On mobile, ConvertForce detects a rapid upward scroll gesture, which tends to indicate the visitor is about to leave.
You can also set a minimum time on page before the trigger activates. This prevents the popup from firing on visitors who land and bounce immediately, before they’ve had a chance to engage with your content at all.
Step 6: Configure the Display Behavior
Triggers tell ConvertForce when to show the popup. The display behavior settings tell it how often to show it and what happens after a visitor closes it.
Two settings matter most here. Display frequency controls how often the same visitor sees the popup, with options for every page load or once per session. When closed controls what happens after the visitor dismisses it, with options to keep showing it or hide it forever.
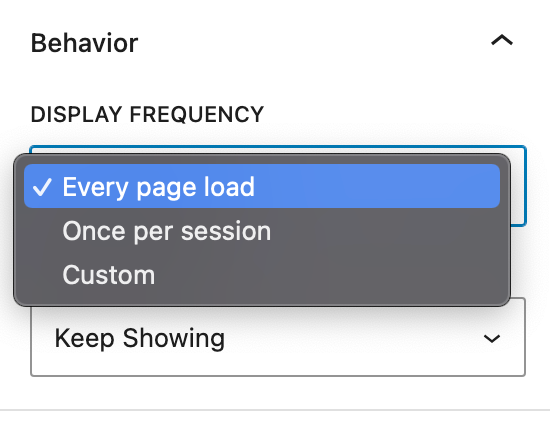
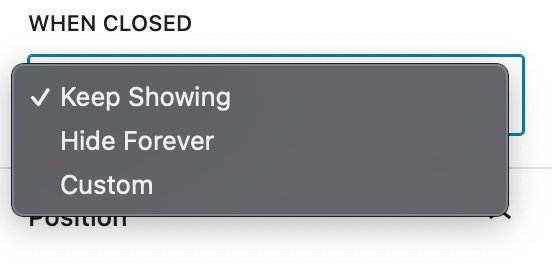
For most sites, the right combination is once per session plus hide forever. This shows the popup to new visitors but doesn’t pester people who have already seen it and decided to move on. Showing an exit popup repeatedly to someone who already dismissed it is one of the fastest ways to increase your bounce rate.
Step 7: Publish and Test the Popup
Once everything is configured, publish the campaign.
To test it, open your site in a new incognito window, so no cached display rules apply. Visit a page where the popup is set to appear, then move your cursor toward the top of the browser window to trigger the exit intent behavior.
Run through this quick checklist before calling it done:
- The popup fires when you move toward the close button
- All your blocks render correctly inside the popup
- The close button is visible and easy to tap on mobile
- The popup looks correct on both desktop and mobile
- After closing, the popup respects your frequency and close behavior settings
If anything looks off, head back into the campaign editor and adjust it.
Tips for Exit Intent Popups That Actually Convert
A few principles that separate exit popups people engage with from ones people instantly dismiss:
Make the offer specific. “Wait, here’s 10% off your first order” converts better than “Don’t leave yet!” The more concrete the benefit, the more likely a visitor is to stop and read it.
One offer, one action. Exit intent popups with a single clear CTA consistently outperform ones that try to do multiple things at once. Pick one goal and build the popup around it.
Match the popup to the page. An exit popup on a product page should be about that product. A generic site-wide message will almost always underperform a targeted one.
Don’t fire on every page load. Set display frequency to once per session and hide forever after close. Repeating the same popup to someone who already dismissed it damages trust more than it helps conversions.
Give mobile the same attention as desktop. Exit intent on mobile works differently, so test on an actual mobile device, not just by resizing your browser window.
Closing Thoughts
Exit intent popups work because they appear at the right moment, after a visitor has already engaged with your content and right before they leave. When the offer is relevant and the timing is right, that combination can recover a meaningful percentage of visitors who would otherwise be gone for good.
The advantage of using ConvertForce for this is that your popup content is built with the same block editor you already use for everything else on your site. No proprietary editor to learn, no page builder required. Just standard WordPress blocks, triggered at the moment it matters most.
If you want to see how exit intent fits alongside ConvertForce’s other campaign types, the notification bar tutorial and the lightbox popup guide cover the full picture.
Leave a Reply