A floating footer bar is one of the simplest ways to promote offers, announcements, or important messages on your website without interrupting visitors.
Unlike popups that block the screen, a floating bar stays fixed at the bottom of the page while users scroll. This makes it highly visible while still keeping the browsing experience smooth.
Many websites use floating footer bars to:
- Promote discounts or sales
- Grow email subscribers
- Highlight announcements
- Promote new blog posts or products
- Drive traffic to important pages
In this guide, you’ll learn how to add a floating footer bar in WordPress step-by-step using the ConvertForce plugin.
What is a Floating Footer Bar?
A floating footer bar is a sticky notification bar that appears at the bottom of a webpage and remains visible as visitors scroll.

Because it stays on screen, it ensures your message gets noticed without disrupting the user experience.
Common use cases include:
- Limited-time offers
- Free trial promotions
- Newsletter signups
- Important announcements
- Product launches
Why Use a Floating Footer Bar?
Floating bars are popular because they combine high visibility with a non-intrusive design.
High Visibility
The bar remains visible as users scroll through the page.
Non-Intrusive
Unlike popups, floating bars do not block the content.
Great for Promotions
You can easily promote:
- Discounts
- New features
- Blog posts
- Free downloads
Boost Conversions
A well-designed floating bar can significantly increase click-through rates.
Method: Add a Floating Footer Bar Using ConvertForce
The easiest way to add a floating footer bar in WordPress is by using ConvertForce.
ConvertForce is a block-based conversion plugin that lets you create:
- Notification bars
- Popups
- Slide-ins
Since the plugin works directly with the Gutenberg block editor, you can design campaigns using familiar WordPress blocks.
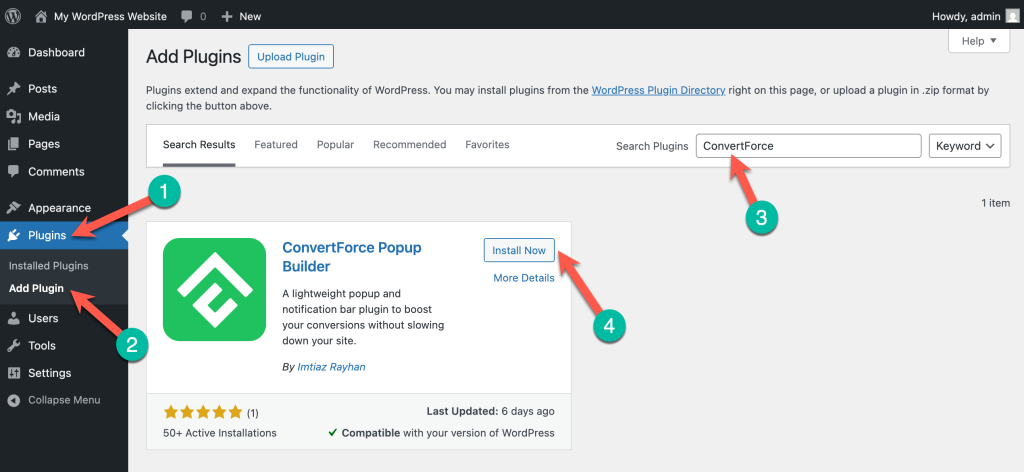
Step 1: Install the ConvertForce Plugin
First, install and activate the plugin.
- Go to Plugins → Add New
- Search for ConvertForce
- Click Install Now
- Activate the plugin
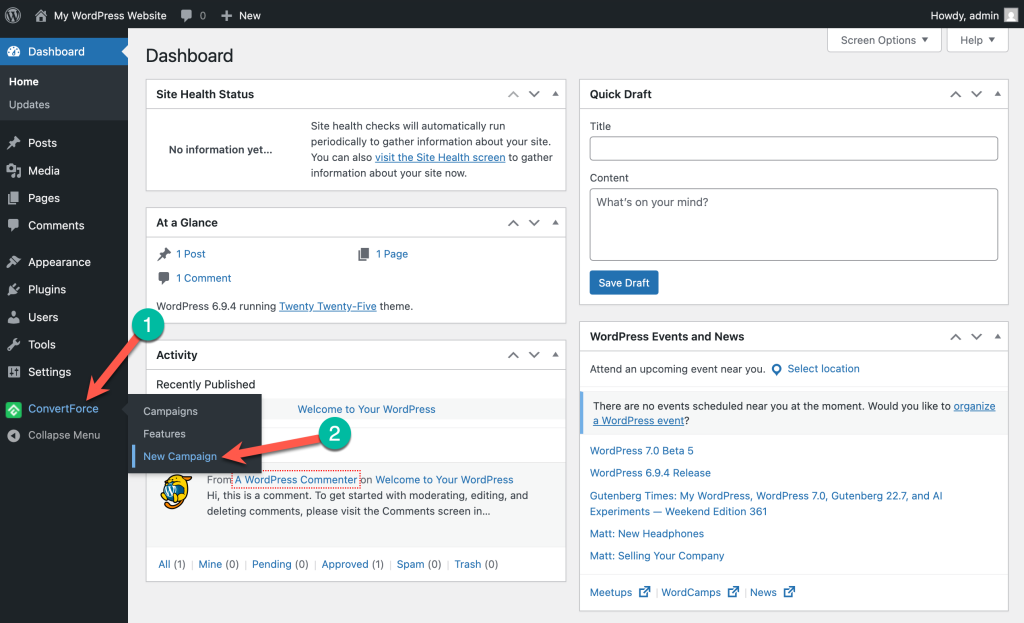
Step 2: Create a New Campaign
Once the plugin is activated, you can create your first campaign.
- Go to ConvertForce → New Campaign
- This will open the campaign builder where you can design your conversion element.
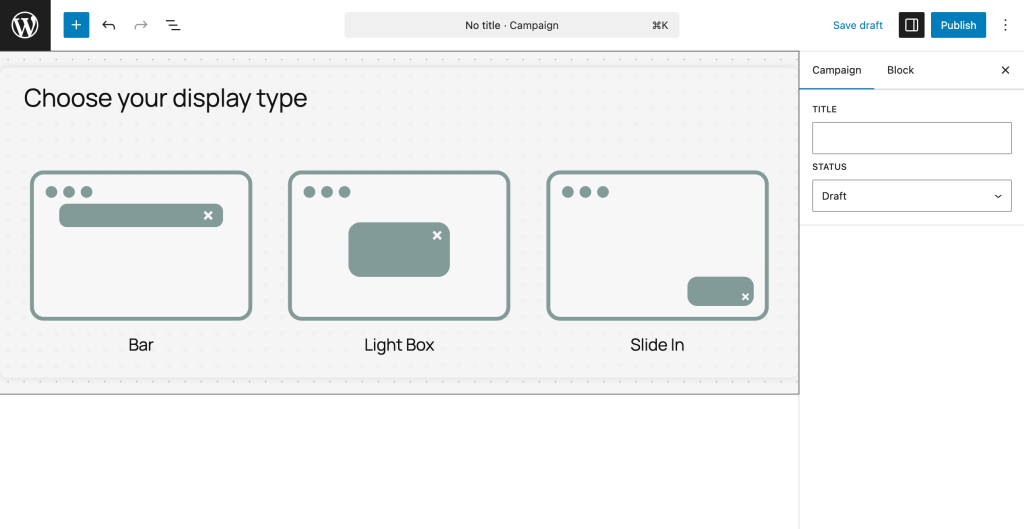
Step 3: Choose the Display Type
ConvertForce allows you to create multiple campaign types:
- Bar
- Light Box
- Slide In
For this tutorial, select Bar.
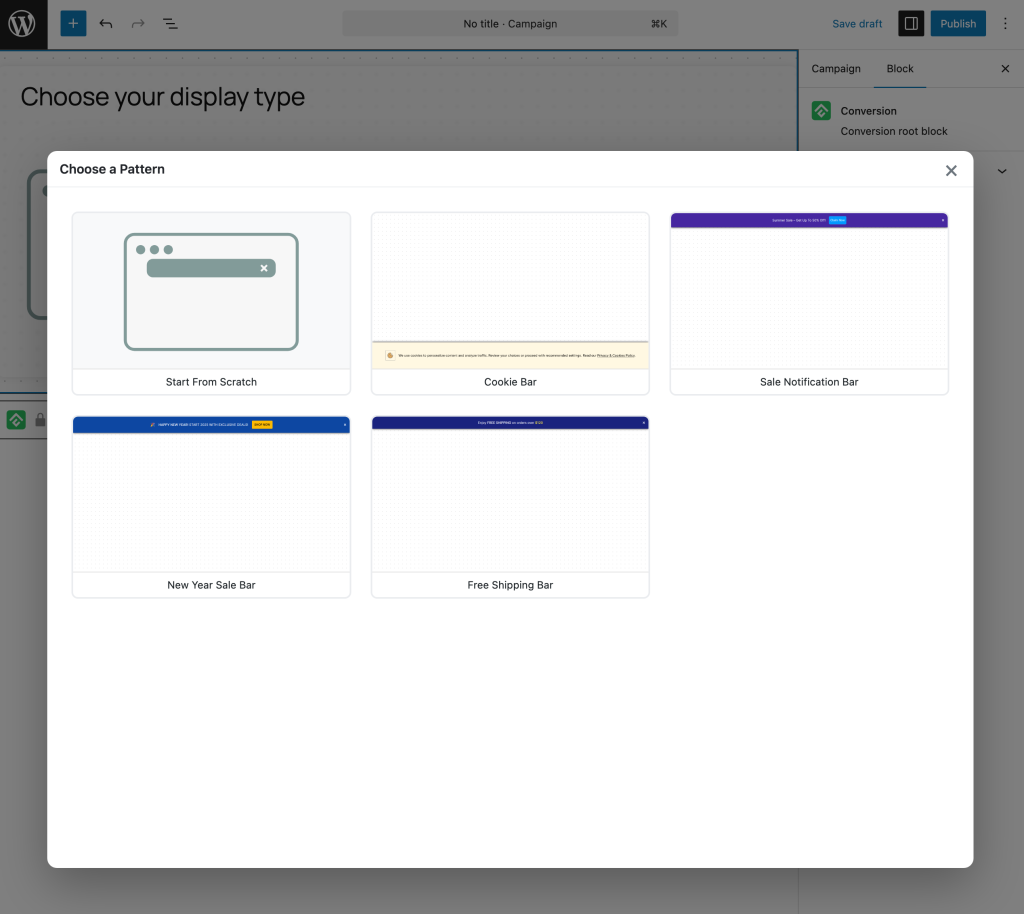
Step 4: Choose a Bar Pattern
Next, you can select a pre-designed pattern.
ConvertForce provides several patterns such as:
- Cookie bar
- Sale notification bar
- Free shipping bar
- New year sale bar
You can also choose Start From Scratch if you want full control over the design.
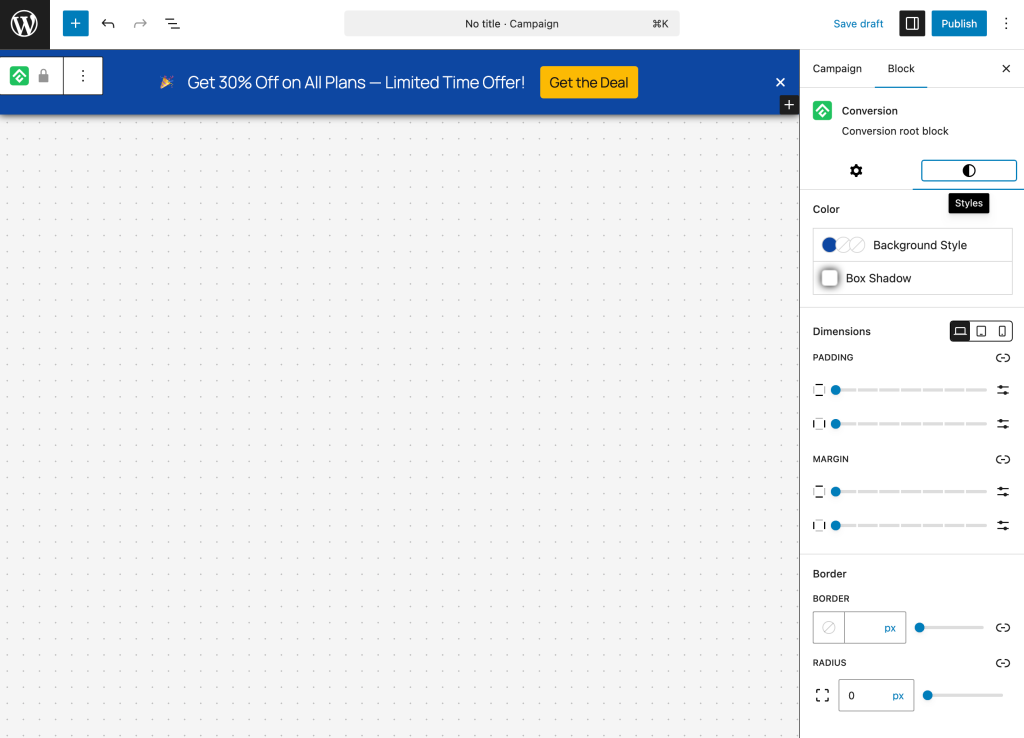
Step 6: Style the Floating Bar
Now you can customize the appearance of the bar.
ConvertForce allows you to modify:
- Background color
- Text color
- Button style
- Padding and spacing
- Border radius
- Box shadow
You can also add Gutenberg blocks inside the bar such as:
- Text
- Buttons
- Icons
- Countdown timers (future feature)
Example message:
🎉 Get 30% Off on All Plans — Limited Time Offer!
Example CTA:
Get the Deal
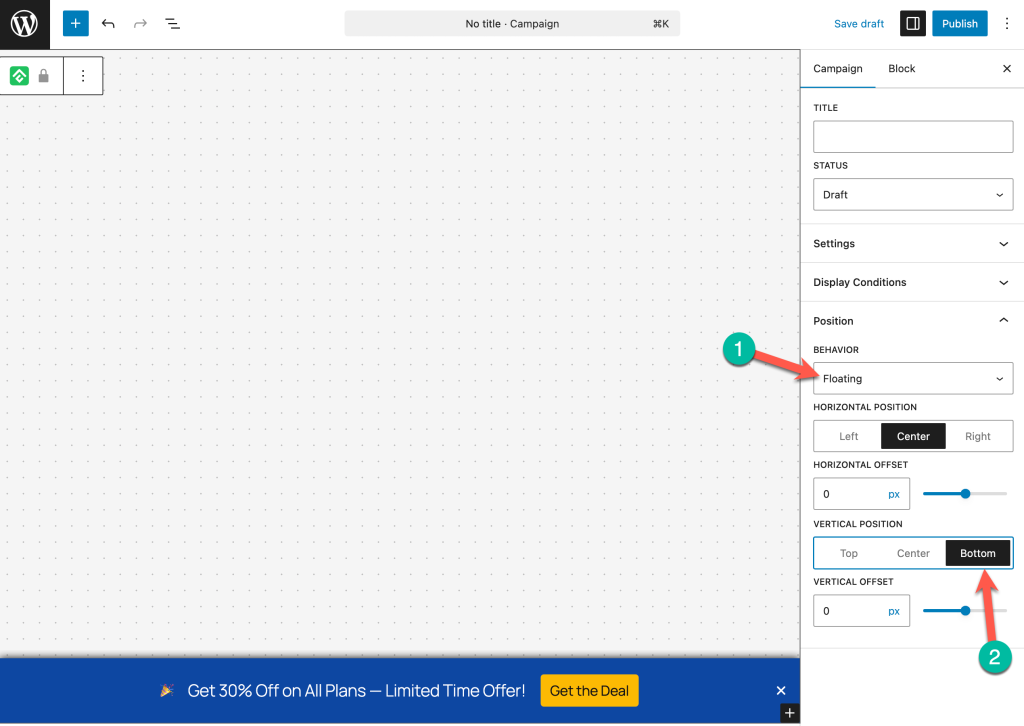
Step 5: Set the Bar Position to Footer
To create a floating footer bar, configure the position settings.
- Set Behavior → Floating
- Set Vertical Position → Bottom
This will make the notification bar appear at the bottom of the screen and remain visible while users scroll.
Step 7: Publish the Campaign
Once your design is ready, publish the campaign.
- Give your campaign a title
- Configure display conditions (for example, show on entire site)
- Click Publish

Your floating footer bar will now appear on your website.
Best Practices for Floating Footer Bars
To maximize results, follow these tips.
Keep the Message Short
Visitors should understand your message instantly.
Good examples:
-
Get 20% Off Today
-
Join 10,000+ Subscribers
-
Download the Free Guide
Use a Strong Call-to-Action
Your CTA button should encourage action.
Examples:
- Get Started
- Claim Offer
- Download Now
- Start Free Trial
Use High-Contrast Colors
Make sure the button stands out from the background.
Example:
Dark background → Bright CTA button
Avoid Overusing It
If every page shows the same message all the time, users may start ignoring it.
Instead, use floating bars for:
- Promotions
- Product launches
- Announcements
- Limited-time campaigns
Conclusion
A floating footer bar is one of the easiest ways to promote important messages and increase conversions on your website.
With ConvertForce, you can create these bars quickly using the familiar WordPress block editor. In just a few minutes, you can design a floating notification bar that promotes offers, announcements, or key content across your website.
If you’re looking for a simple way to add notification bars, popups, and slide-ins in WordPress, ConvertForce provides a flexible and beginner-friendly solution.
Leave a Reply