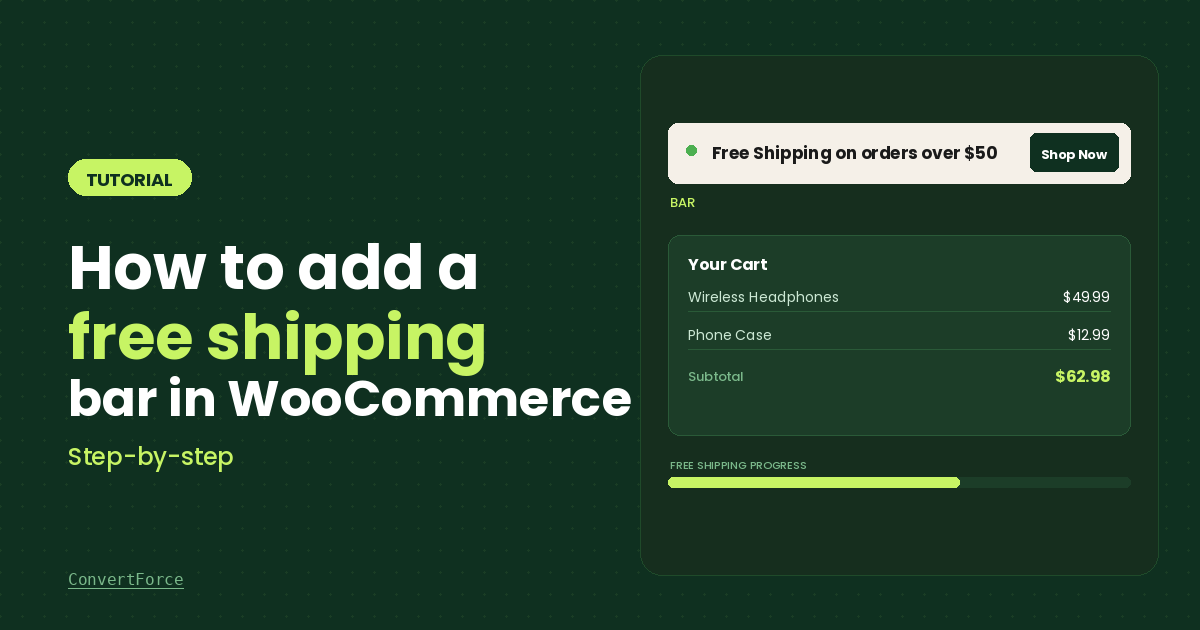
Free shipping is one of the most effective ways to reduce cart abandonment and increase average order value. But simply offering free shipping is not enough — shoppers need to see the offer clearly as they browse your store.
A free shipping bar is a notification bar that sits at the top or bottom of your site and tells visitors exactly what they need to do to qualify. A message like “Free shipping on all orders over $50” displayed persistently can nudge shoppers to add one more item instead of leaving.
In this guide, you will learn how to add a free shipping bar to your WooCommerce store using ConvertForce, a Gutenberg-native WordPress plugin for creating bars, popups, and slide-ins.
Important note: The shipping bar you create with ConvertForce displays a fixed message. It does not sync with WooCommerce or update dynamically based on a shopper’s cart total. Make sure the message matches your actual WooCommerce shipping settings, and update it manually if those settings change later.
Before You Begin
This tutorial covers how to display the free shipping bar. It does not create the shipping rule itself. Before setting up the bar, go to WooCommerce > Settings > Shipping and configure a free shipping method with the threshold you want to promote. That way, when a customer meets the requirement, the discount is applied automatically at checkout.
Why Use ConvertForce for a Free Shipping Bar
ConvertForce is built directly on the WordPress block editor. You create and customize your bar using the same interface you use to write posts and pages — no separate page builder, no unfamiliar visual editor to learn.
It is also lightweight and does not add bloat to your store, which matters on an eCommerce site where page speed directly affects conversions.
Add a Free Shipping Bar in WooCommerce Using ConvertForce
Step 1: Install and Activate ConvertForce
From your WordPress dashboard, go to Plugins > Add New Plugin. Search for “ConvertForce” and click Install Now, then Activate.
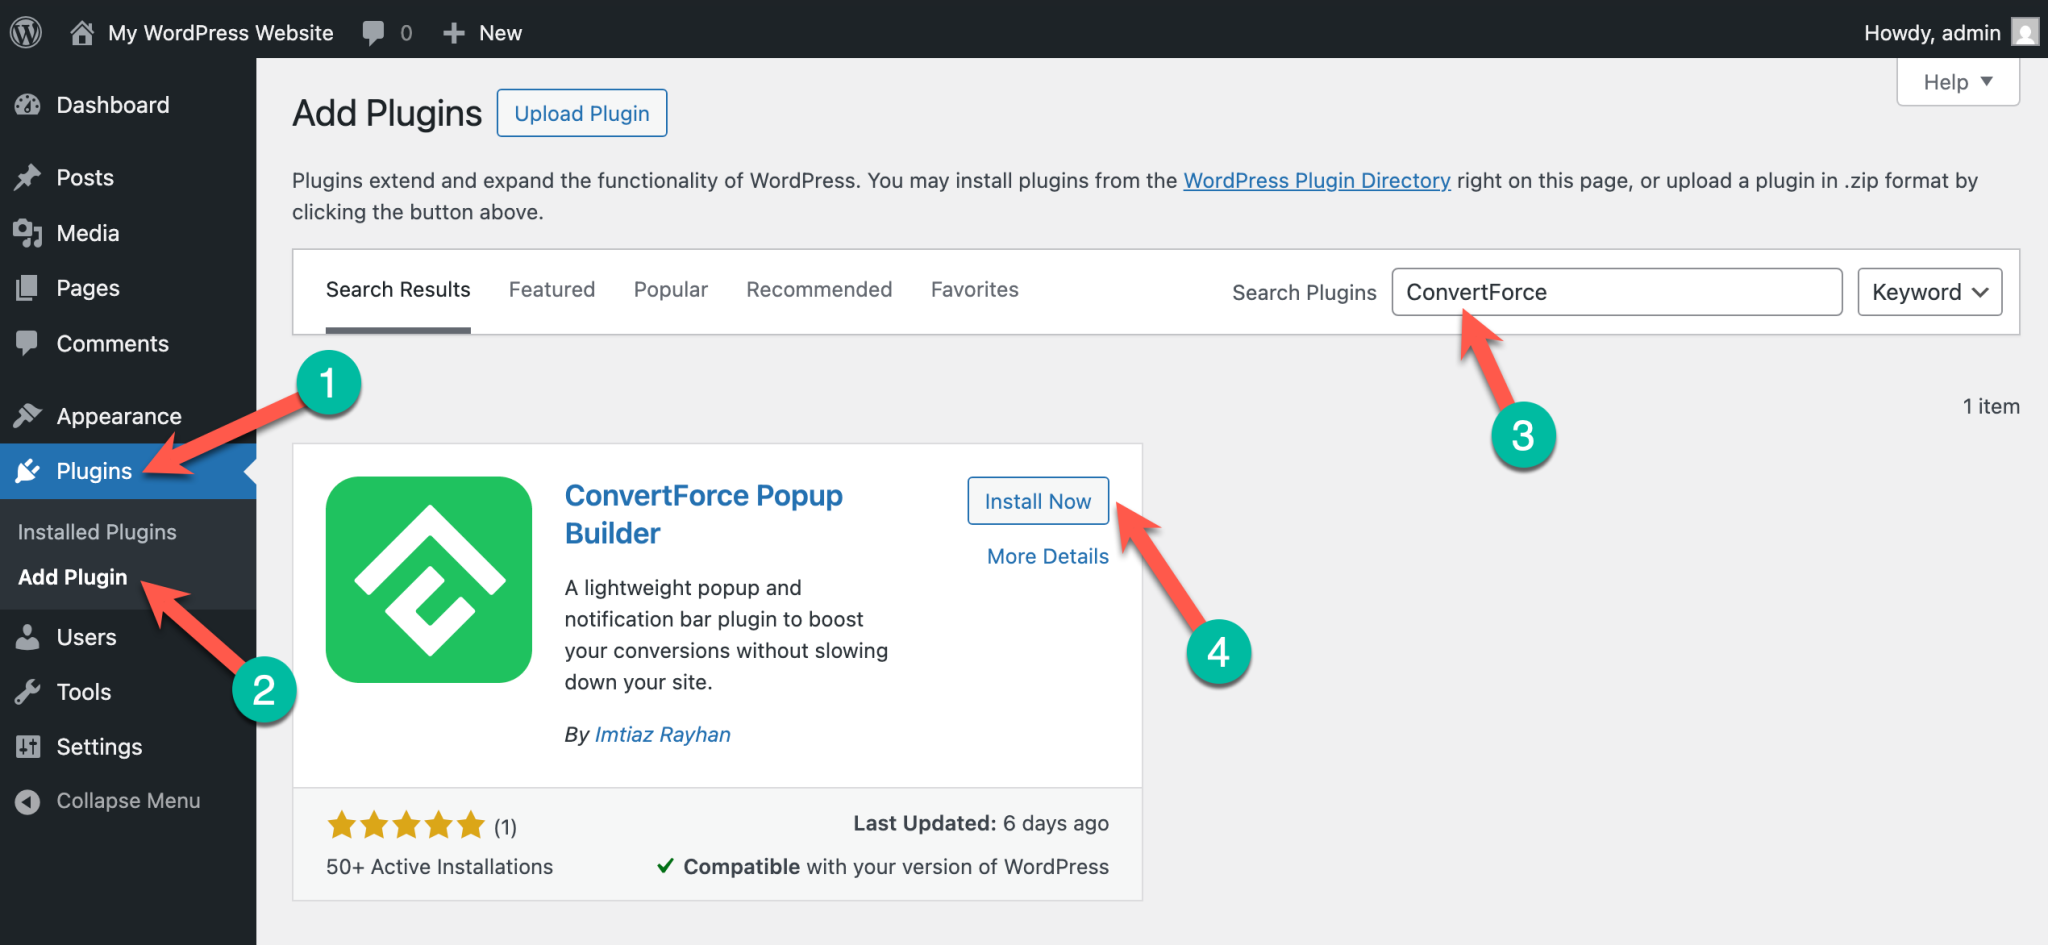
Once activated, ConvertForce will appear in your WordPress admin menu.
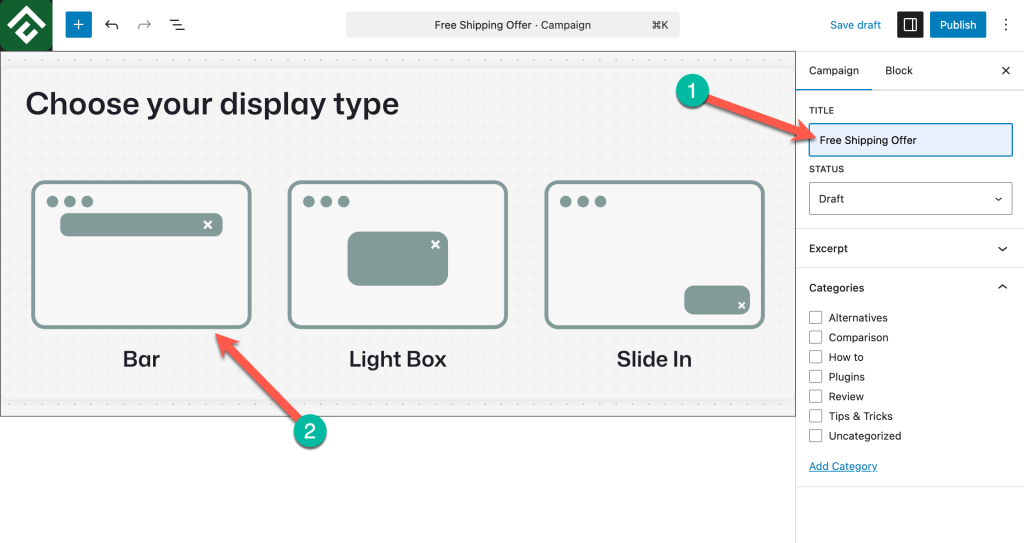
Step 2: Create a New Bar Campaign
Go to ConvertForce in your dashboard and click ‘New Campaign’.

Then give your campaign a name such as “Free Shipping Bar,” and select a display type.
Step 3: Choose the “Free Shipping Bar” Pattern
ConvertForce includes a prebuilt pattern specifically for free shipping bars. Select the “Free Shipping Bar” pattern to get started with a ready-made design.
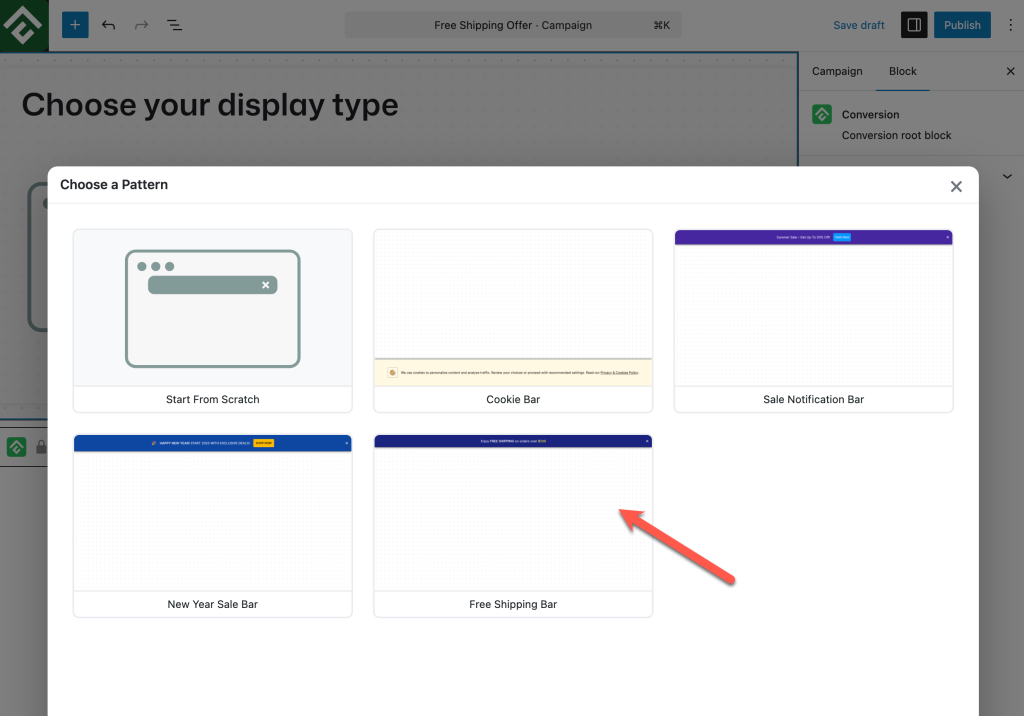
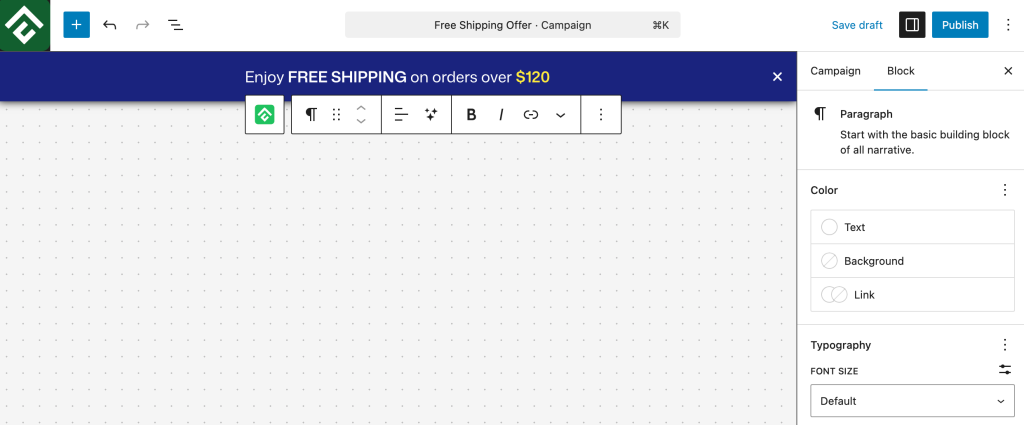
The pattern comes pre-filled with placeholder text — “Enjoy FREE SHIPPING on orders over $120” — so you are not starting from scratch. You will update this text with your actual threshold in the next step.
Step 4: Customize and Style the Free Shipping Bar
Click on the text block and replace the placeholder with your actual free shipping message. Keep it short and direct. Here are a few examples:
- “Free shipping on all orders over $50.”
- “Spend $50 or more and get free shipping at checkout.”
- “Free shipping sitewide this week.”
The condition you write here must match what you have configured in WooCommerce. If you later change your free shipping threshold, remember to update this bar text as well.
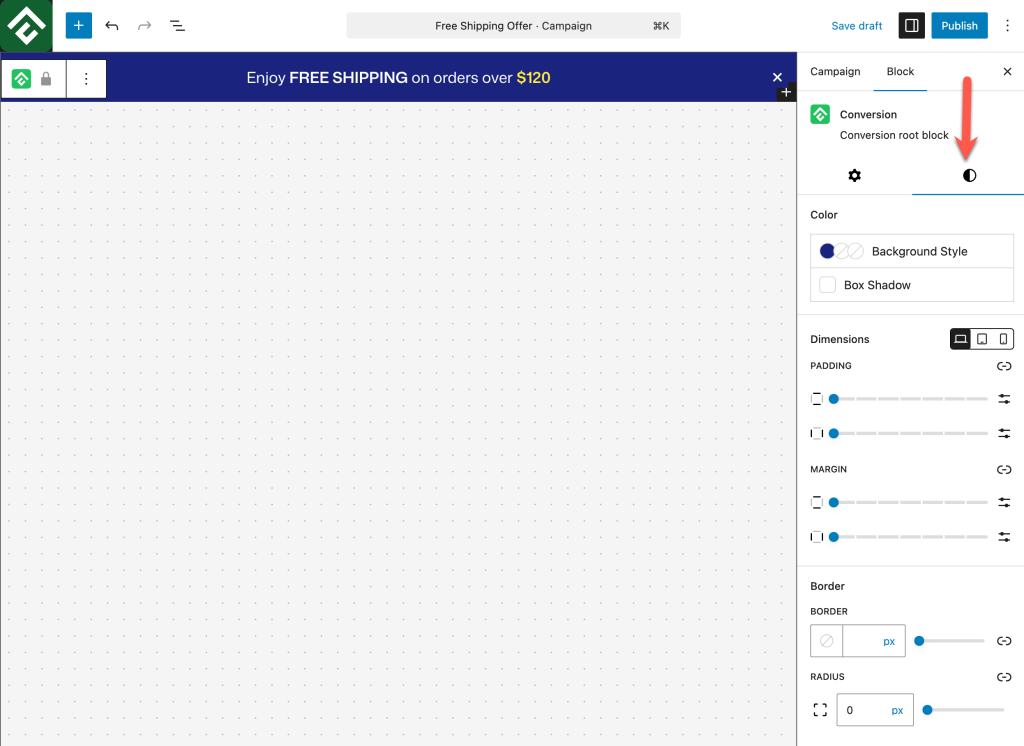
From the block settings panel, you can adjust the background color, text color, and font size to match your store’s branding. (You need to make sure that you’ve selected the root block)
If you want to include a call-to-action button — for example, one that links to your shop or cart page — you can add a Button block inside the bar to give visitors a direct path to act on the offer.
Step 5: Set the Position of the Bar
By default, the bar will appear at the top of the screen. If you want it at the bottom instead, you can change this easily.
Go to the Campaign tab and look for the Behavior > Postion. From there, choose either Top or Bottom depending on where you want the bar to appear on your store.
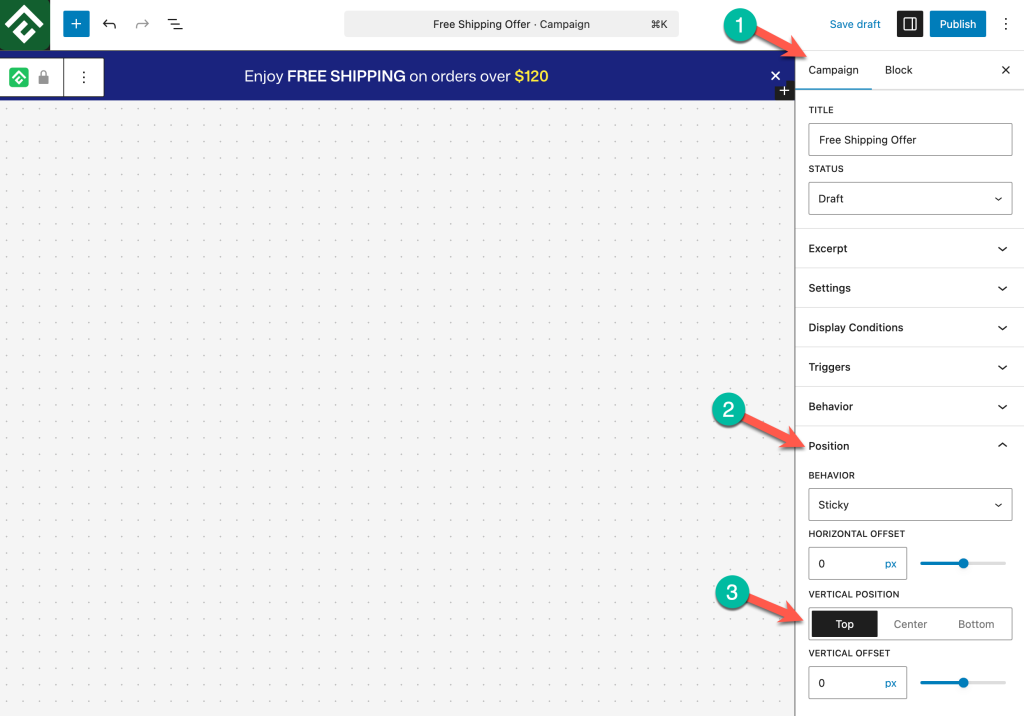
The top position tends to get more visibility since visitors see it immediately on page load.
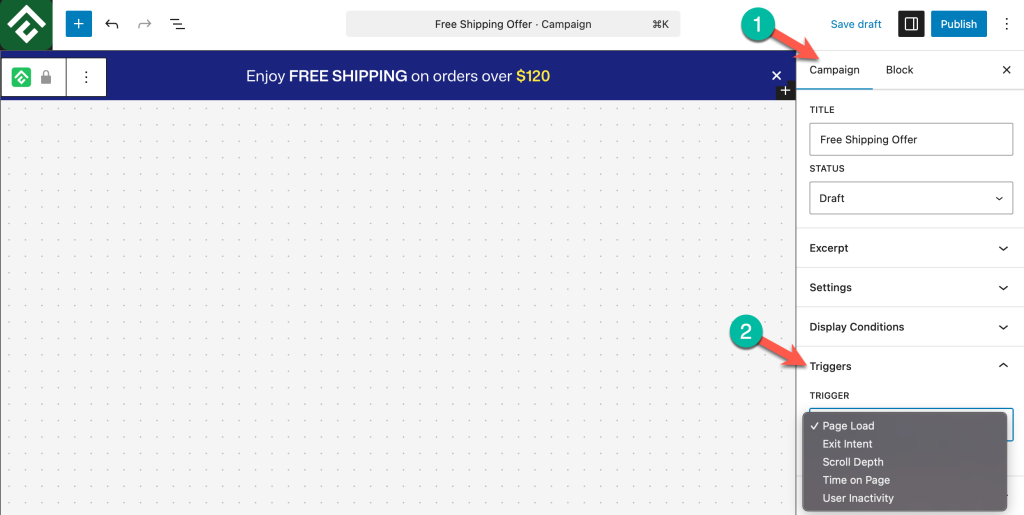
Step 6: Configure Display Conditions
Next, set where the bar appears across your store. Click on the Display Conditions tab inside the campaign editor.
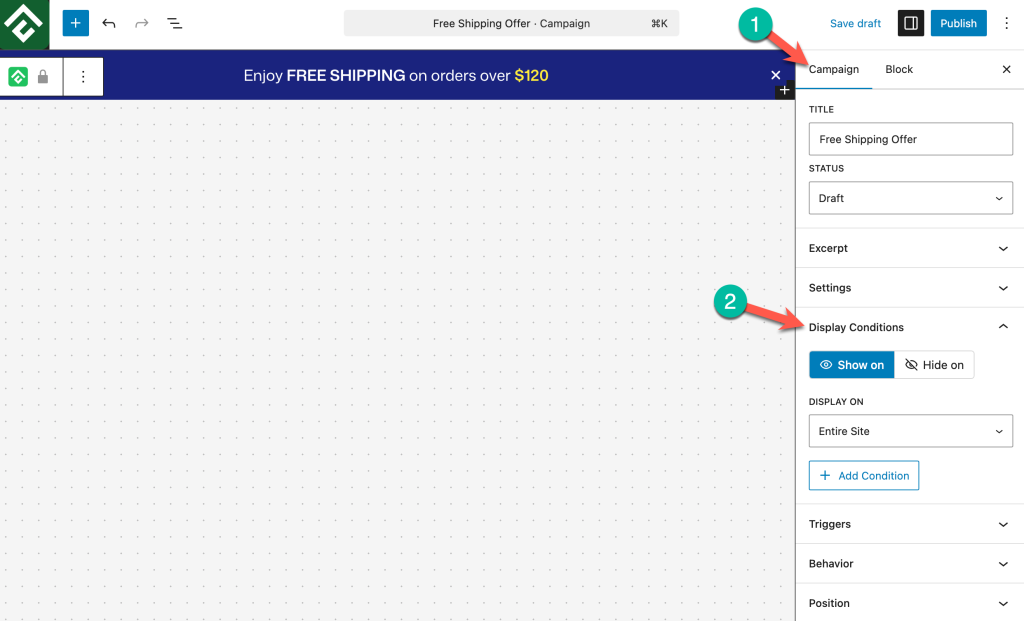
By default, the bar will appear across your entire site. If you prefer to show it only on WooCommerce-related pages such as the shop, product pages, and cart, you can restrict it using the page targeting options.
You can also set a trigger that controls when the bar appears to a visitor. The Time Delay trigger is available on the free plan and shows the bar after a visitor has been on the page for a specified number of seconds. If you are on the Pro plan, you have access to additional triggers including Exit Intent, Scroll Depth, and User Inactivity.
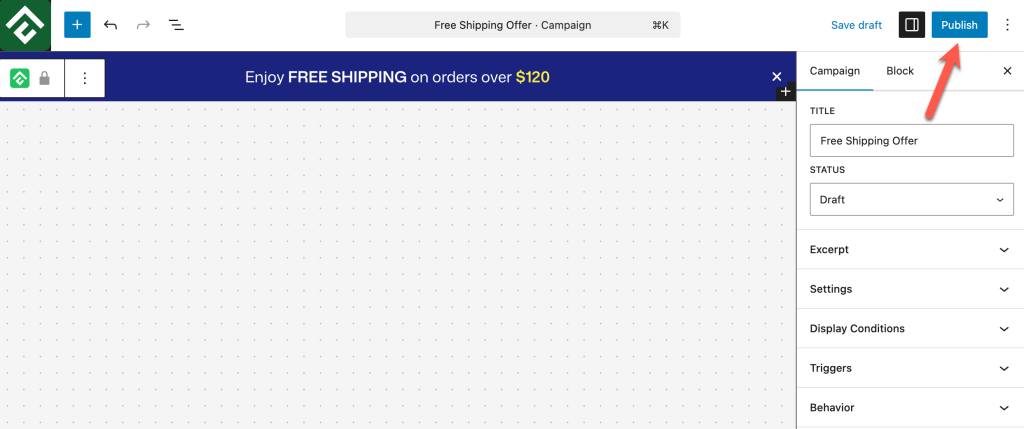
Step 7: Publish the Campaign
Once you are satisfied with the bar and its settings, click Publish at the top of the editor to make the campaign live.
Visit your store as a regular visitor would to confirm the bar is appearing as expected. If you restricted it to specific pages, check those pages directly.
Frequently Asked Questions
Does the free shipping bar update dynamically based on a shopper’s cart?
No. The bar displays a fixed message that you write manually. It does not connect to your WooCommerce cart and does not update in real time. If a shopper adds items and gets closer to the free shipping threshold, the bar text will not reflect that. You can update the bar text yourself any time your offer changes.
Can I show the bar only on certain pages?
Yes. ConvertForce lets you set page-level targeting so the bar appears only on specific pages, such as the shop page, individual product pages, or the cart page.
Do I need a Pro plan to add a free shipping bar?
No. You can create and publish a bar campaign on the free plan. Pro features such as Exit Intent, Scroll Depth, and User Inactivity triggers require an upgrade, but the core bar functionality is available for free.
Can I style the bar to match my store’s design?
Yes. Background color, text color, and font size are all customizable inside the block editor so the bar fits naturally with your theme.
Can I run multiple bar campaigns at the same time?
Yes. ConvertForce supports multiple active campaigns, so you can run different bars for different promotions or target different bars to different pages simultaneously.
A free shipping bar is one of the simplest additions you can make to a WooCommerce store to reduce cart abandonment and increase average order value. With ConvertForce, the whole setup takes only a few minutes and happens entirely inside the WordPress block editor.
If you want to explore other ways to promote offers on your site, see our guides on how to add an announcement bar in WordPress and how to add a lightbox popup in WordPress.
Leave a Reply